Welcome back to the blog! I hope the previous post got you thinking about stationery in a different way. Today, I’m looking forward to showing you one of my favorite (and one of the easiest) ways to get your favorite paper goods out of your desk drawer and onto the walls of your home.
But first, here are the three Rifle Paper Co. products that I own:
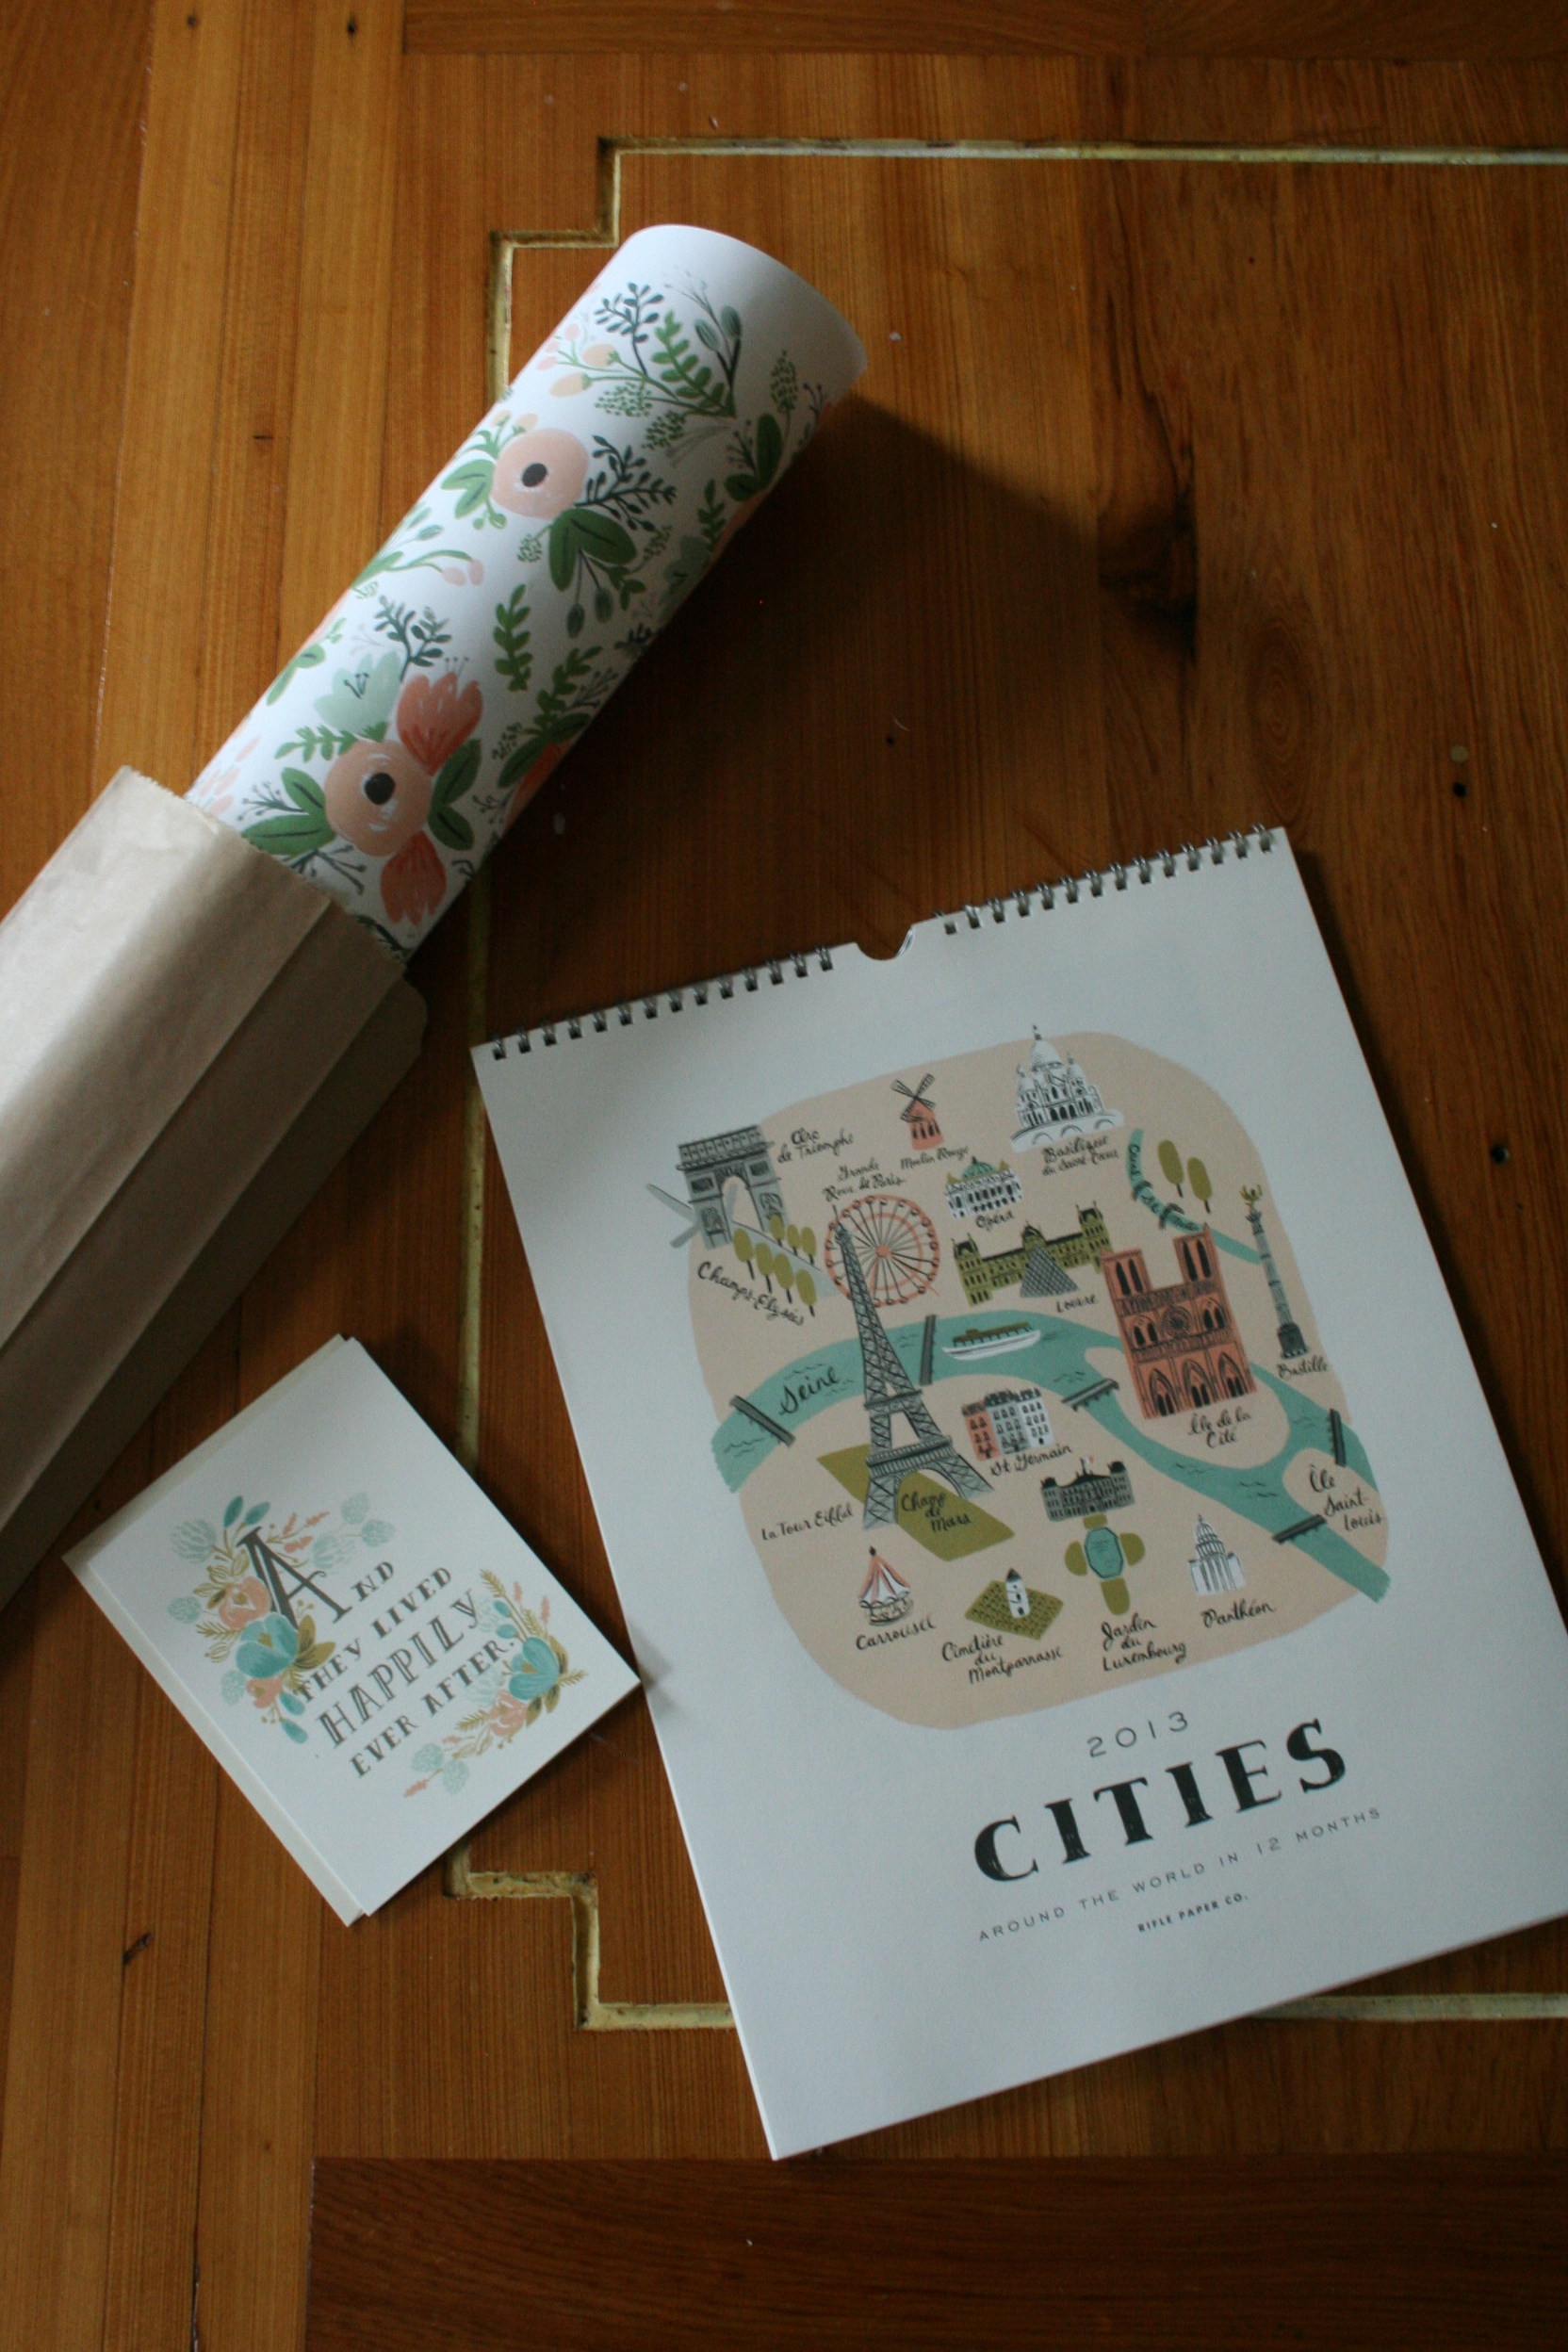
Wildflower Wrapping Sheet / Happily Ever After card / 2013 Cities Calendar
I splurged on the Cities Calendar last year because I loved all of the prints and knew that I would reuse them long after the calendar itself was outdated. More recently I found the Happily Ever After card at Anthropologie and fell in love with the color scheme and the font. It sparked an idea for my bedroom, the results of which you’ll see later on this week. And finally, I fell for the wildflower floral print on a recent trip to visit my sister-in-law. Again, it was the colors that got me. In particular, the faint blue-green flower that perfectly matches my kitchen walls. I knew just the spot to hang a framed section of this beautiful print.

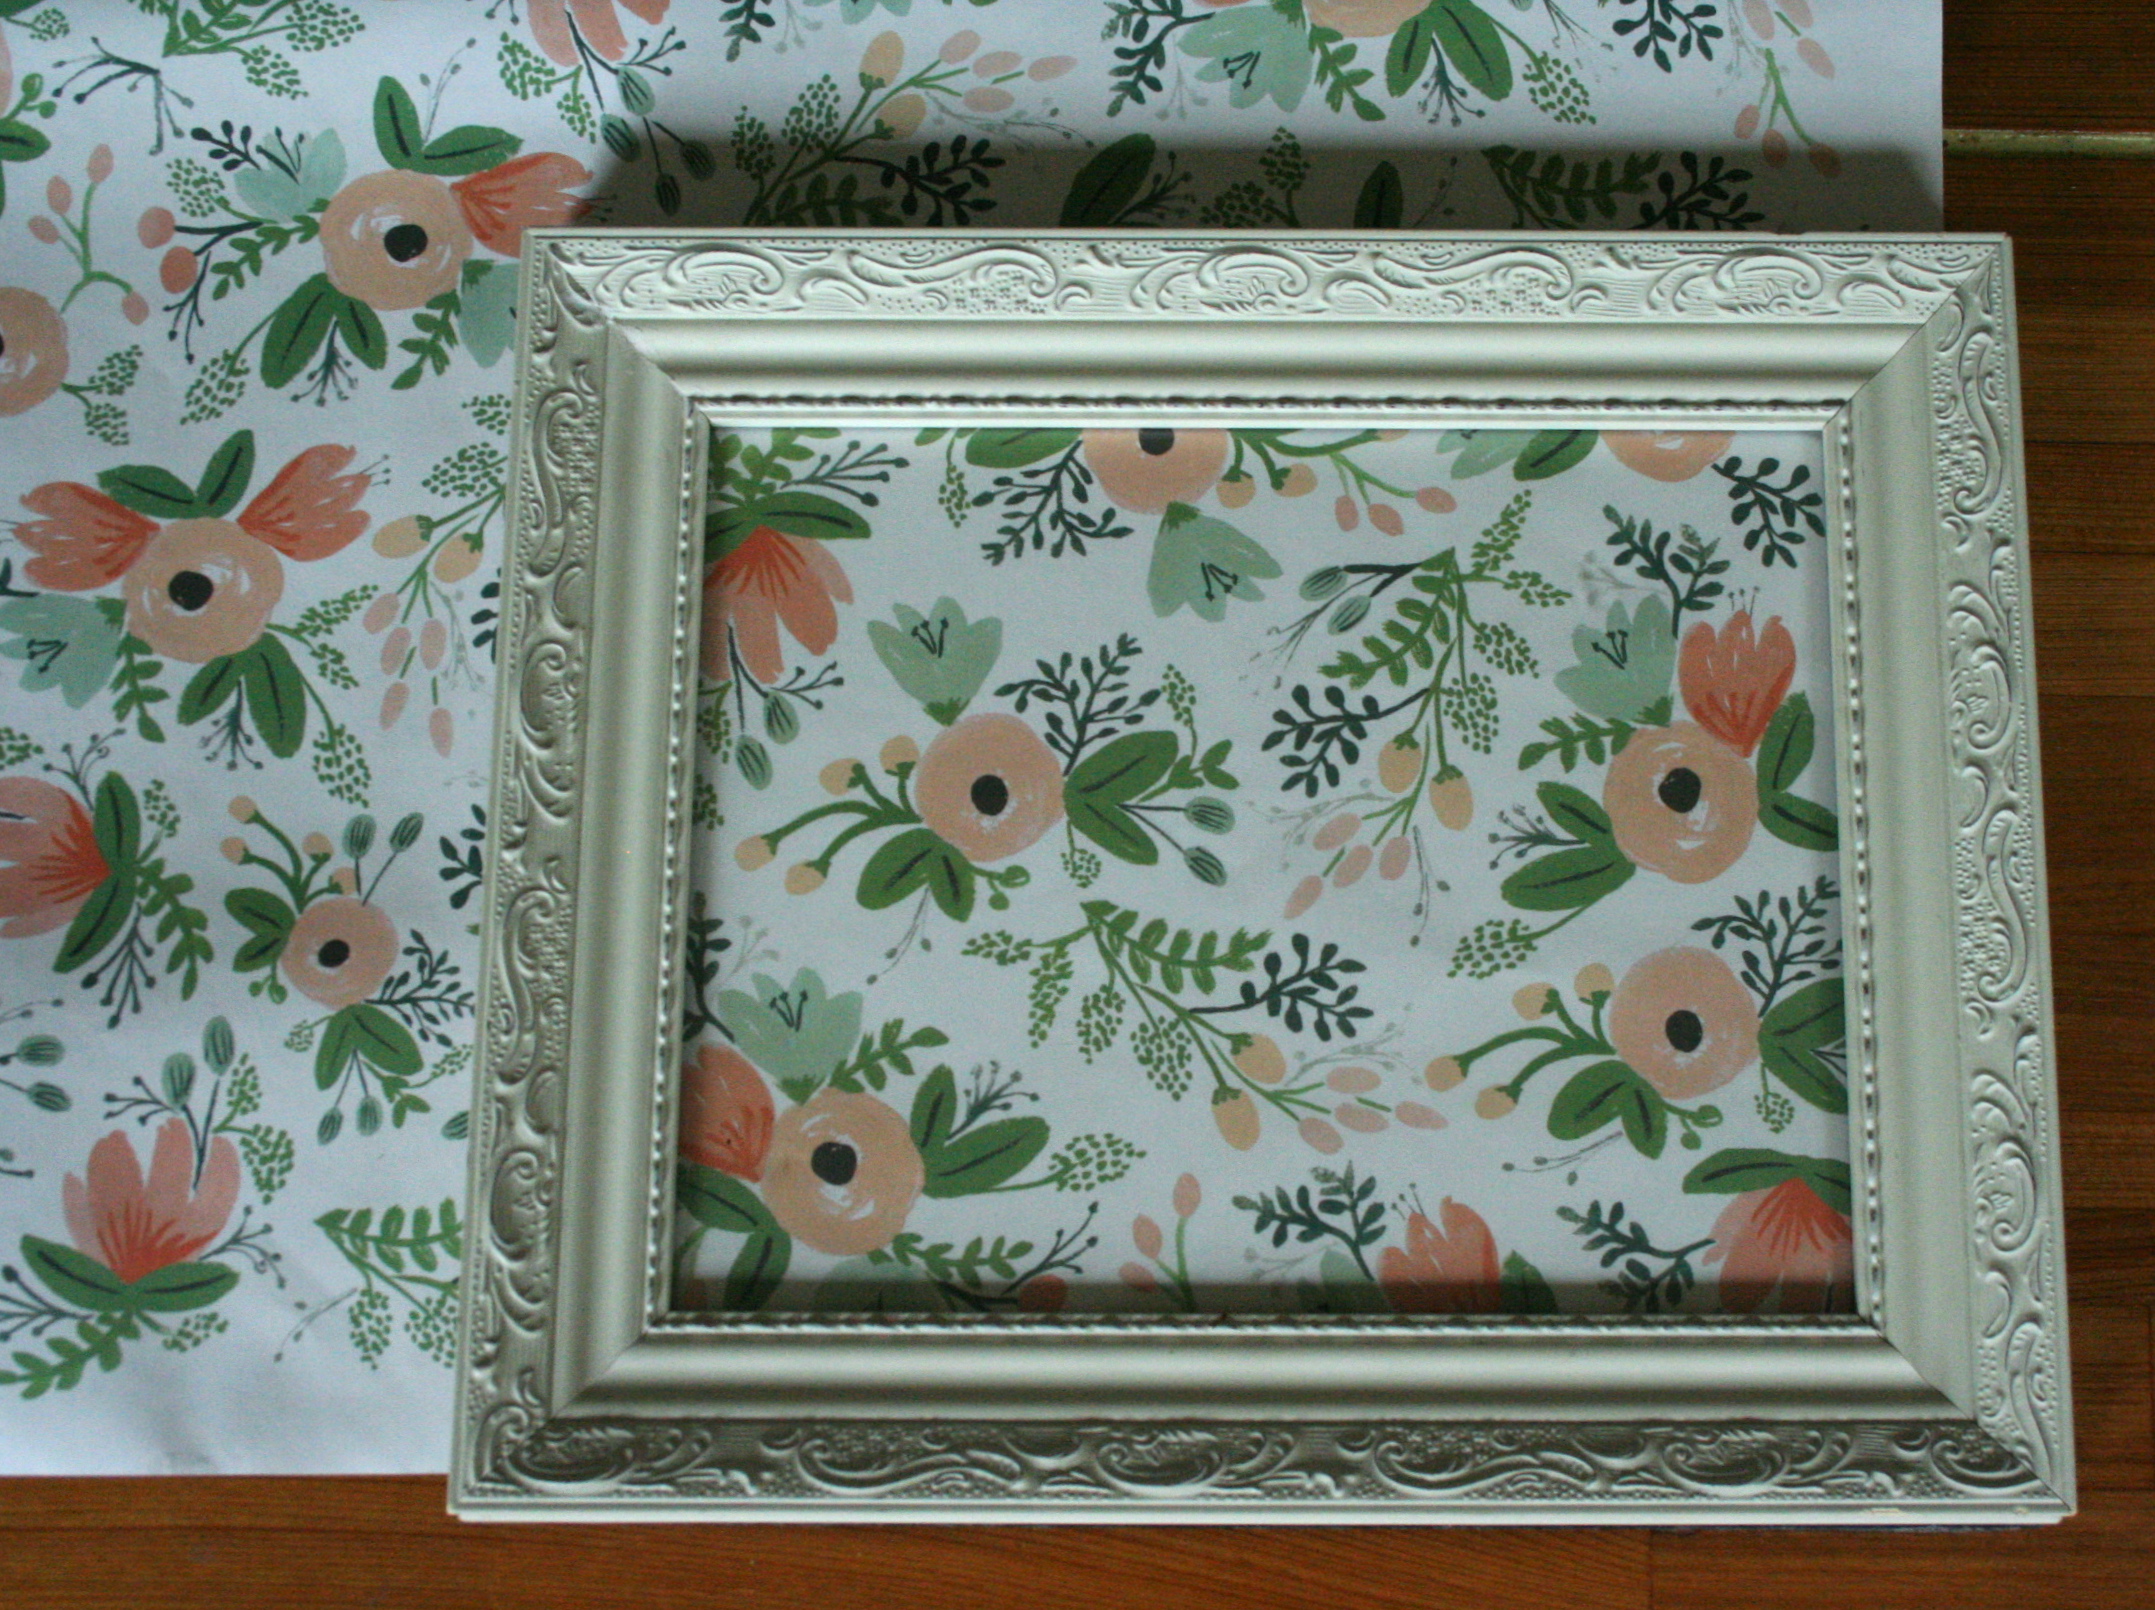
Here’s an upclose view of the floral print. This is a singular sheet of wrapping paper that I got for about $5, which is expensive for one sheet of wrapping paper, but completely affordable for a framed print. I love that the flowers are thick and chunky with visible brush strokes. A little Matisse-ish if you ask me.
Follow along as we work with this lovely little print today in
DESIGN CRUSH DIY: FRAMED PAPER
STEP ONE: Gather Your Tools

Paper / Scissors / Frame / Pencil
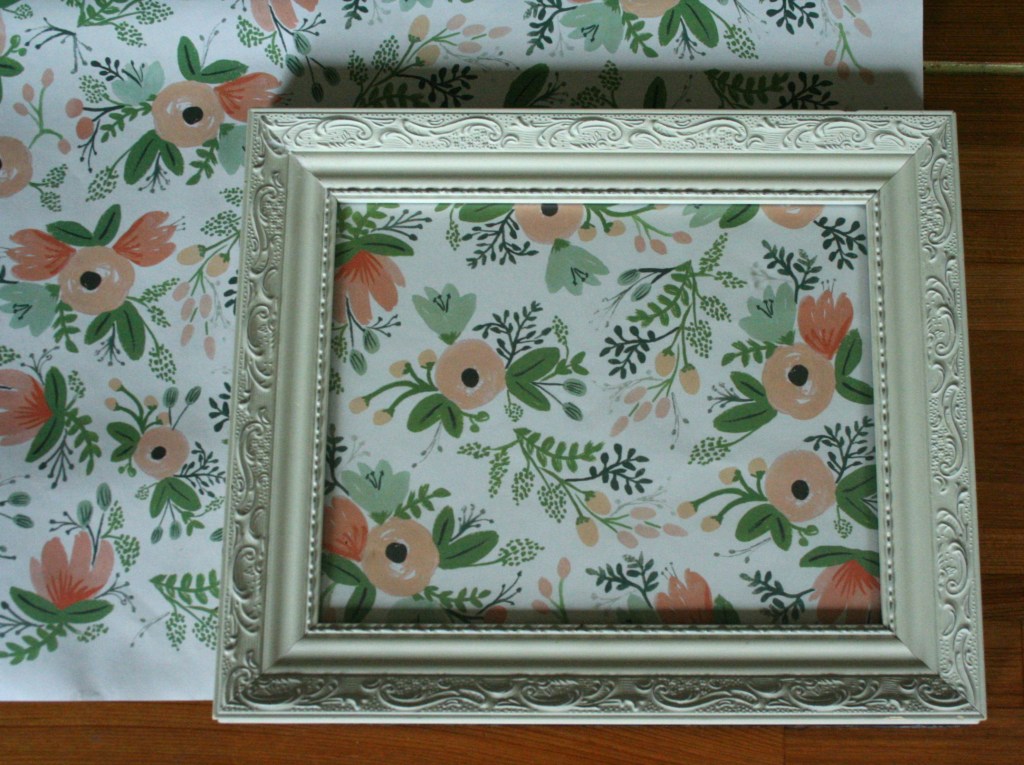
I’m using a wrapping sheet, but scrapbook paper also works well and is very affordable. Any paper with a design or pattern that inspires you is perfect. I’m using a frame I already owned, but of course you could purchase a new frame or find one at a flea market, yard sale, or wherever suits your fancy.
STEP TWO: FIND YOUR PATTERN PLACEMENT

Open your frame, remove the glass and other inserts, and move it around on your paper to find out what section you want to frame. My paper has a repeating pattern with no clear direction, which made it easy to place. Other patterns may take a bit more time to find the correct placement. This will also give you a good idea how much of the pattern will be hidden behind the frame.
STEP THREE: TRACE THE GLASS
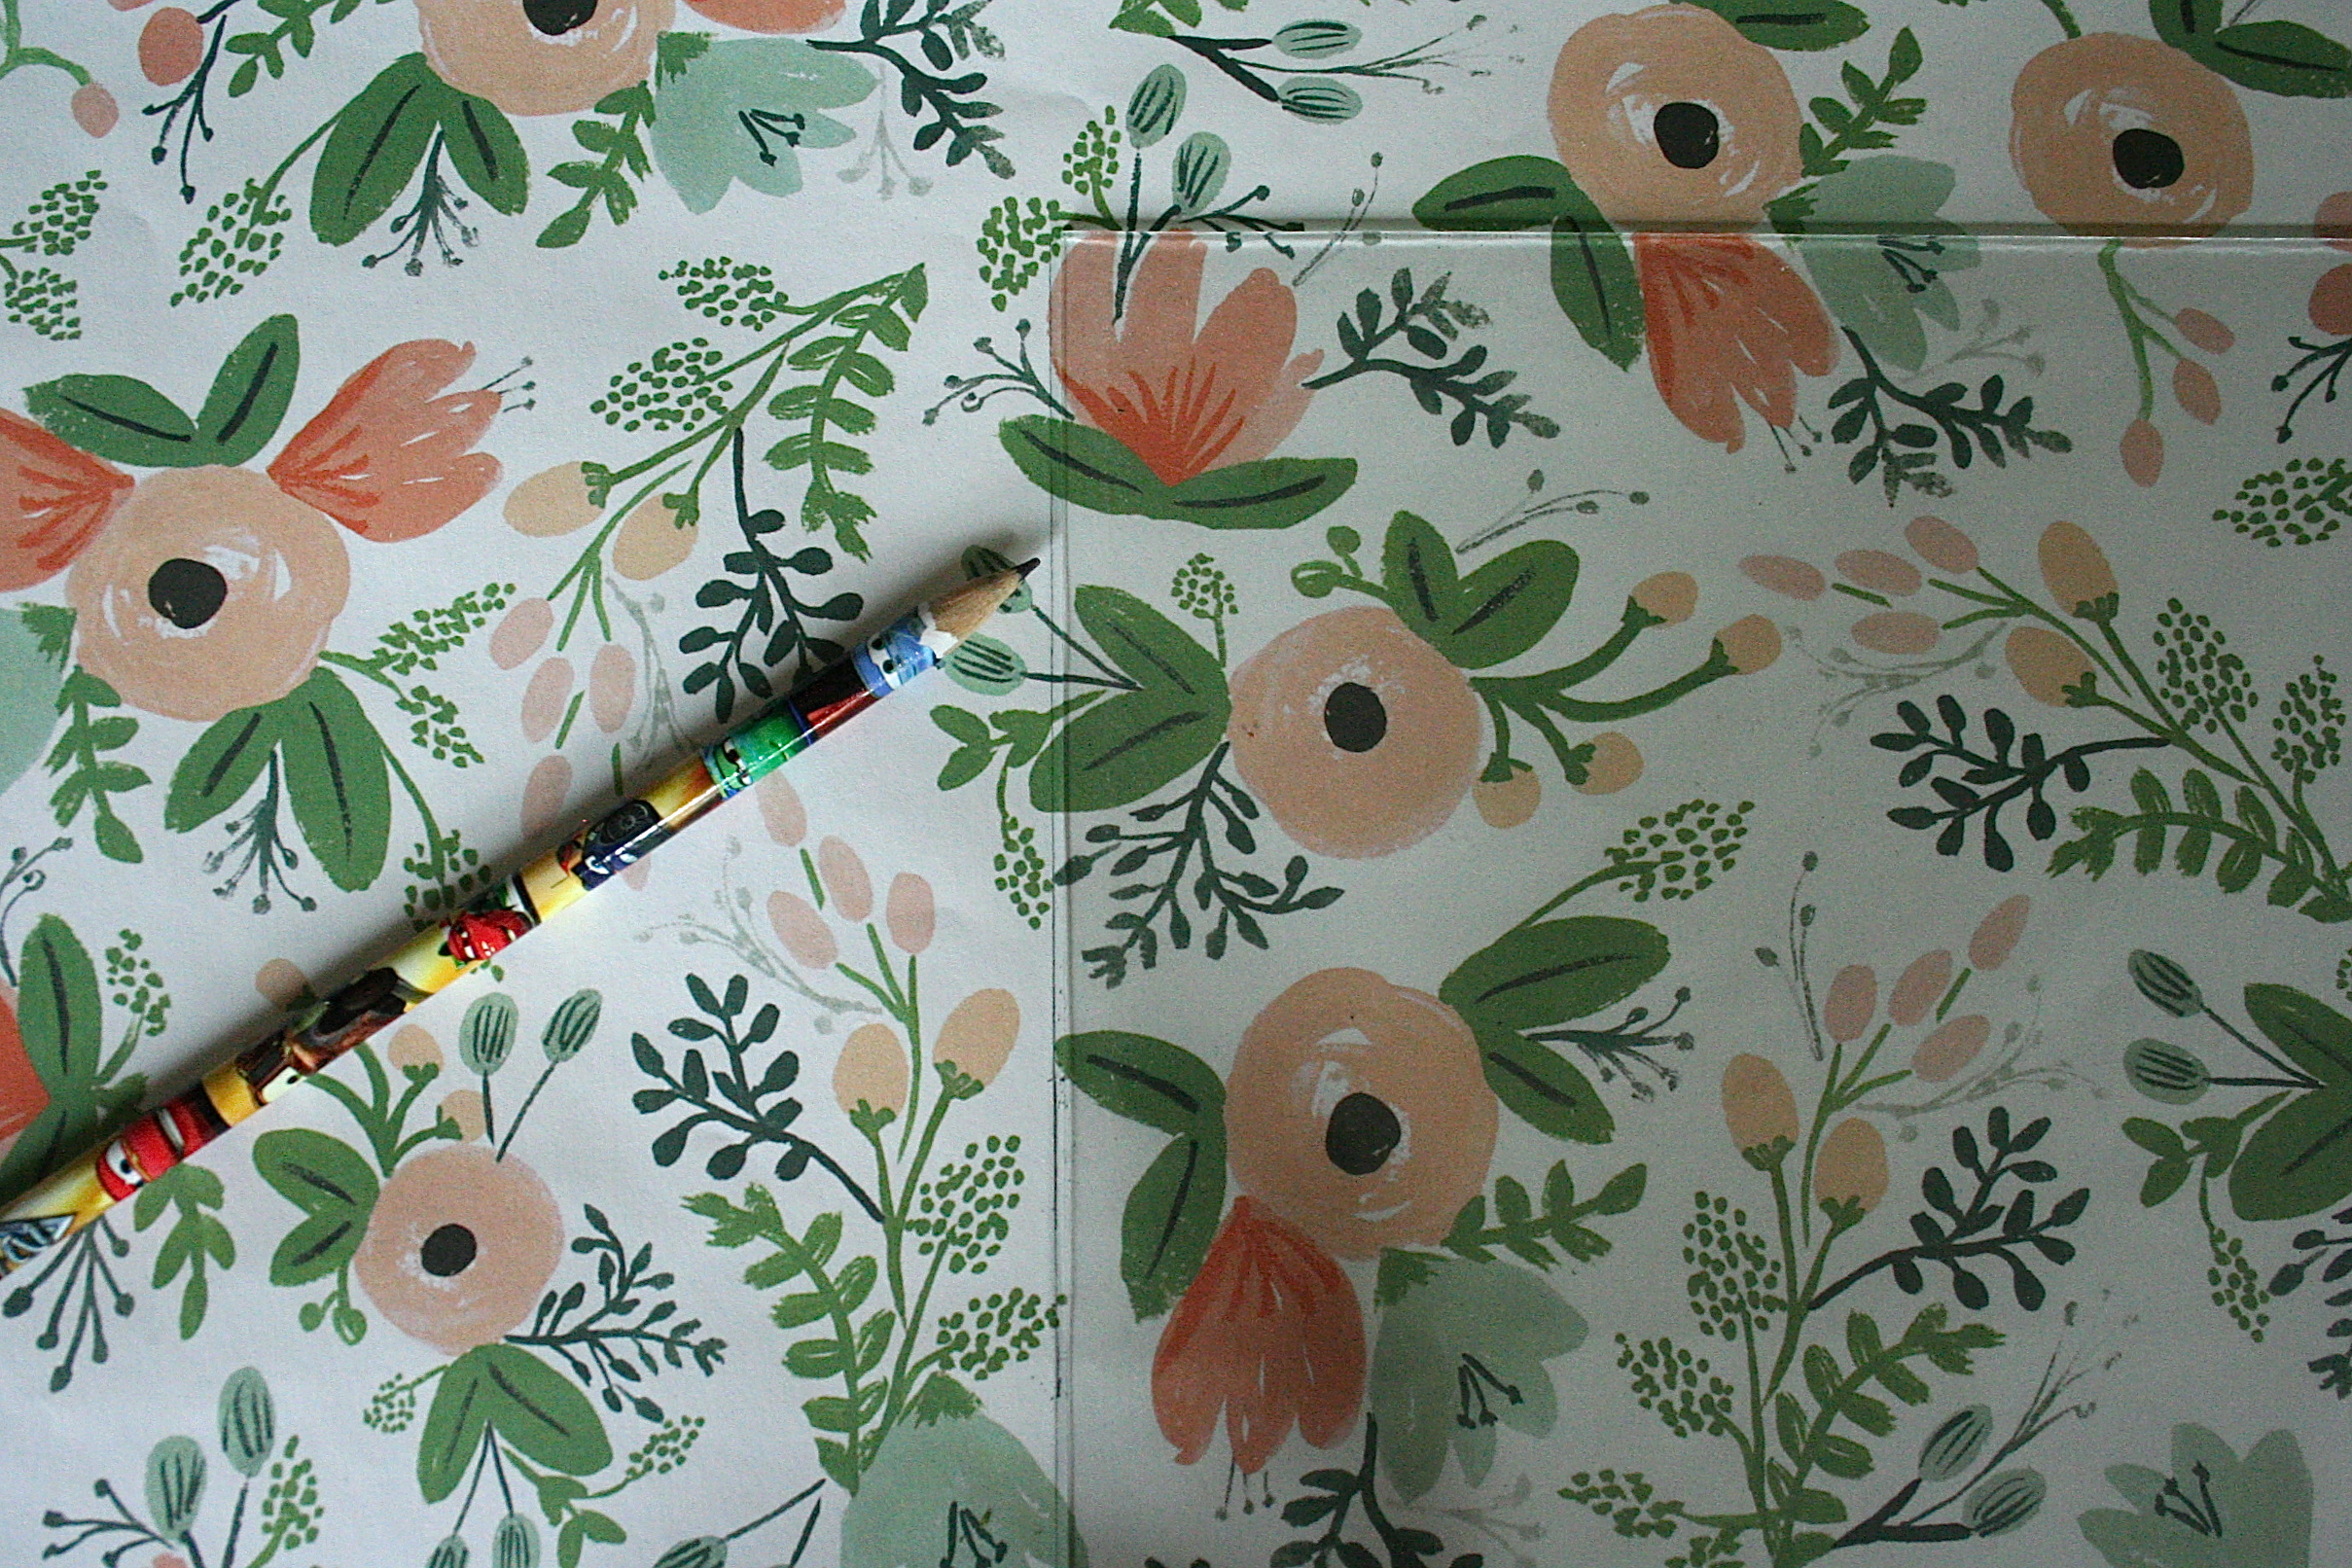
Place the glass insert over the section of paper you’ve decided to frame and trace the edges with a pencil.
STEP FOUR: CUT

Take one last look at the section you’ve outlined to make sure it’s what you want, then grab those scissors and cut out along the lines you just traced. I always try to waste as little paper as possible when tracing and cutting so that I can save as much paper as possible for future projects.
STEP FIVE: PLACE IN FRAME
Place your cut out paper behind the glass in the frame and secure. Now it’s ready to hang on your wall.
Unless…you hang it on your wall and decide it needs a little lagniappe. Then you scrounge around in your craft closet for those two plates you purchased last fall and decide this is the perfect opportunity to add them to the mix.
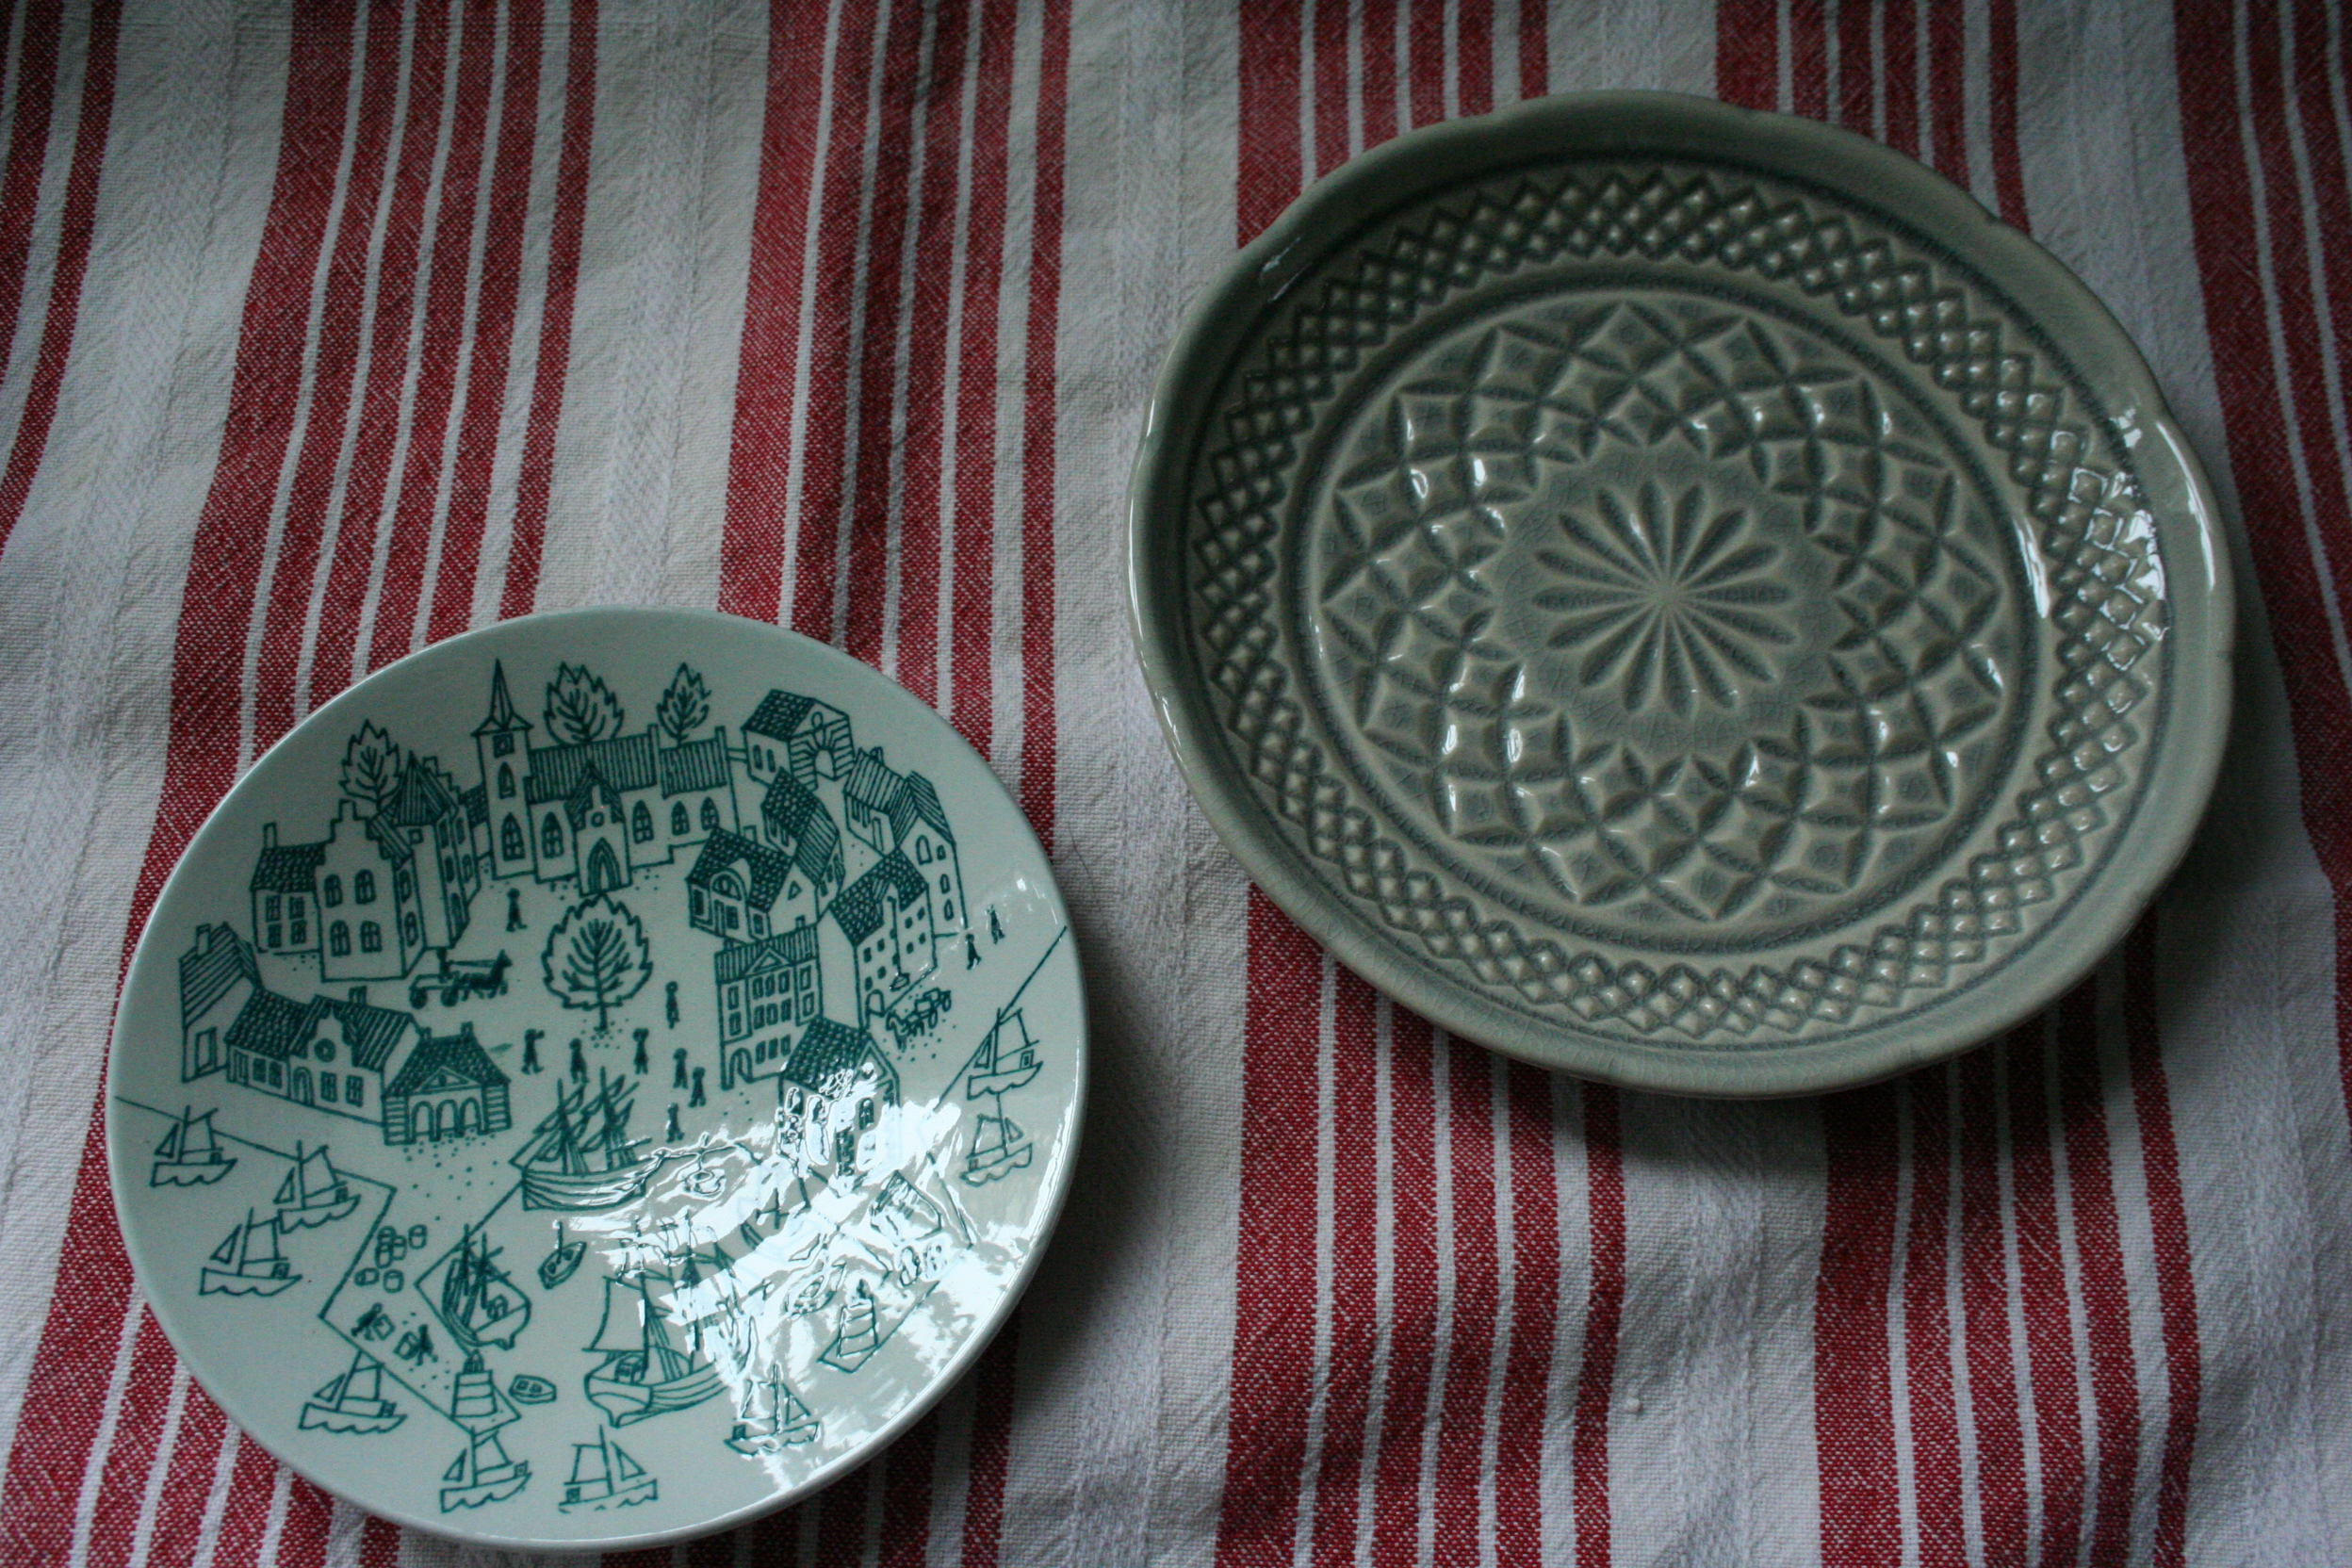
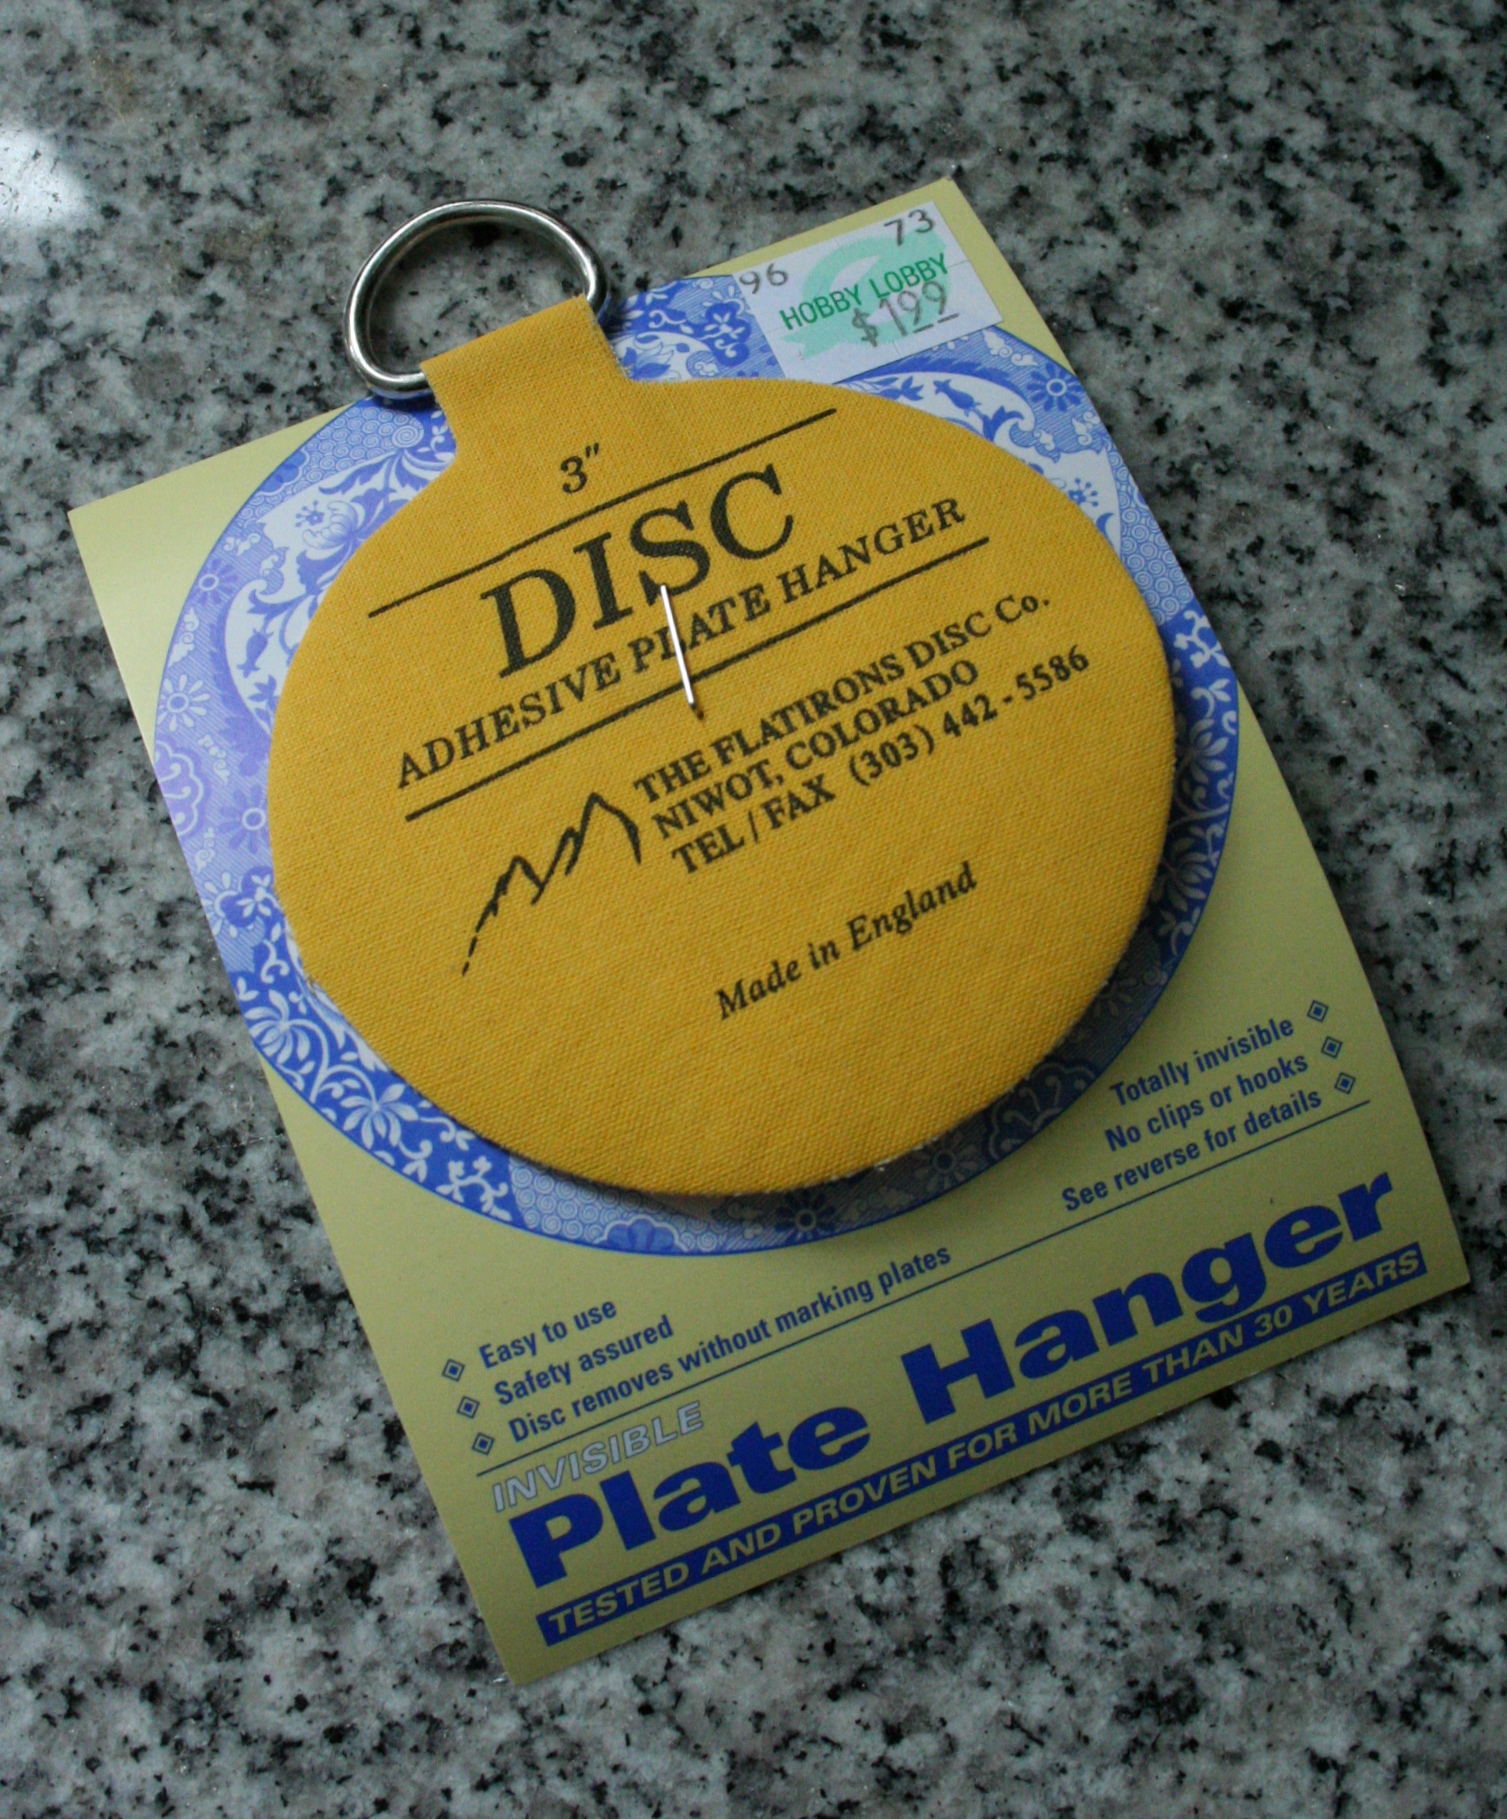
In that case, you’ll need these handy plate hangers. I purchased two at Hobby Lobby.
STEP SIX: ATTACH PLATE HANGERS
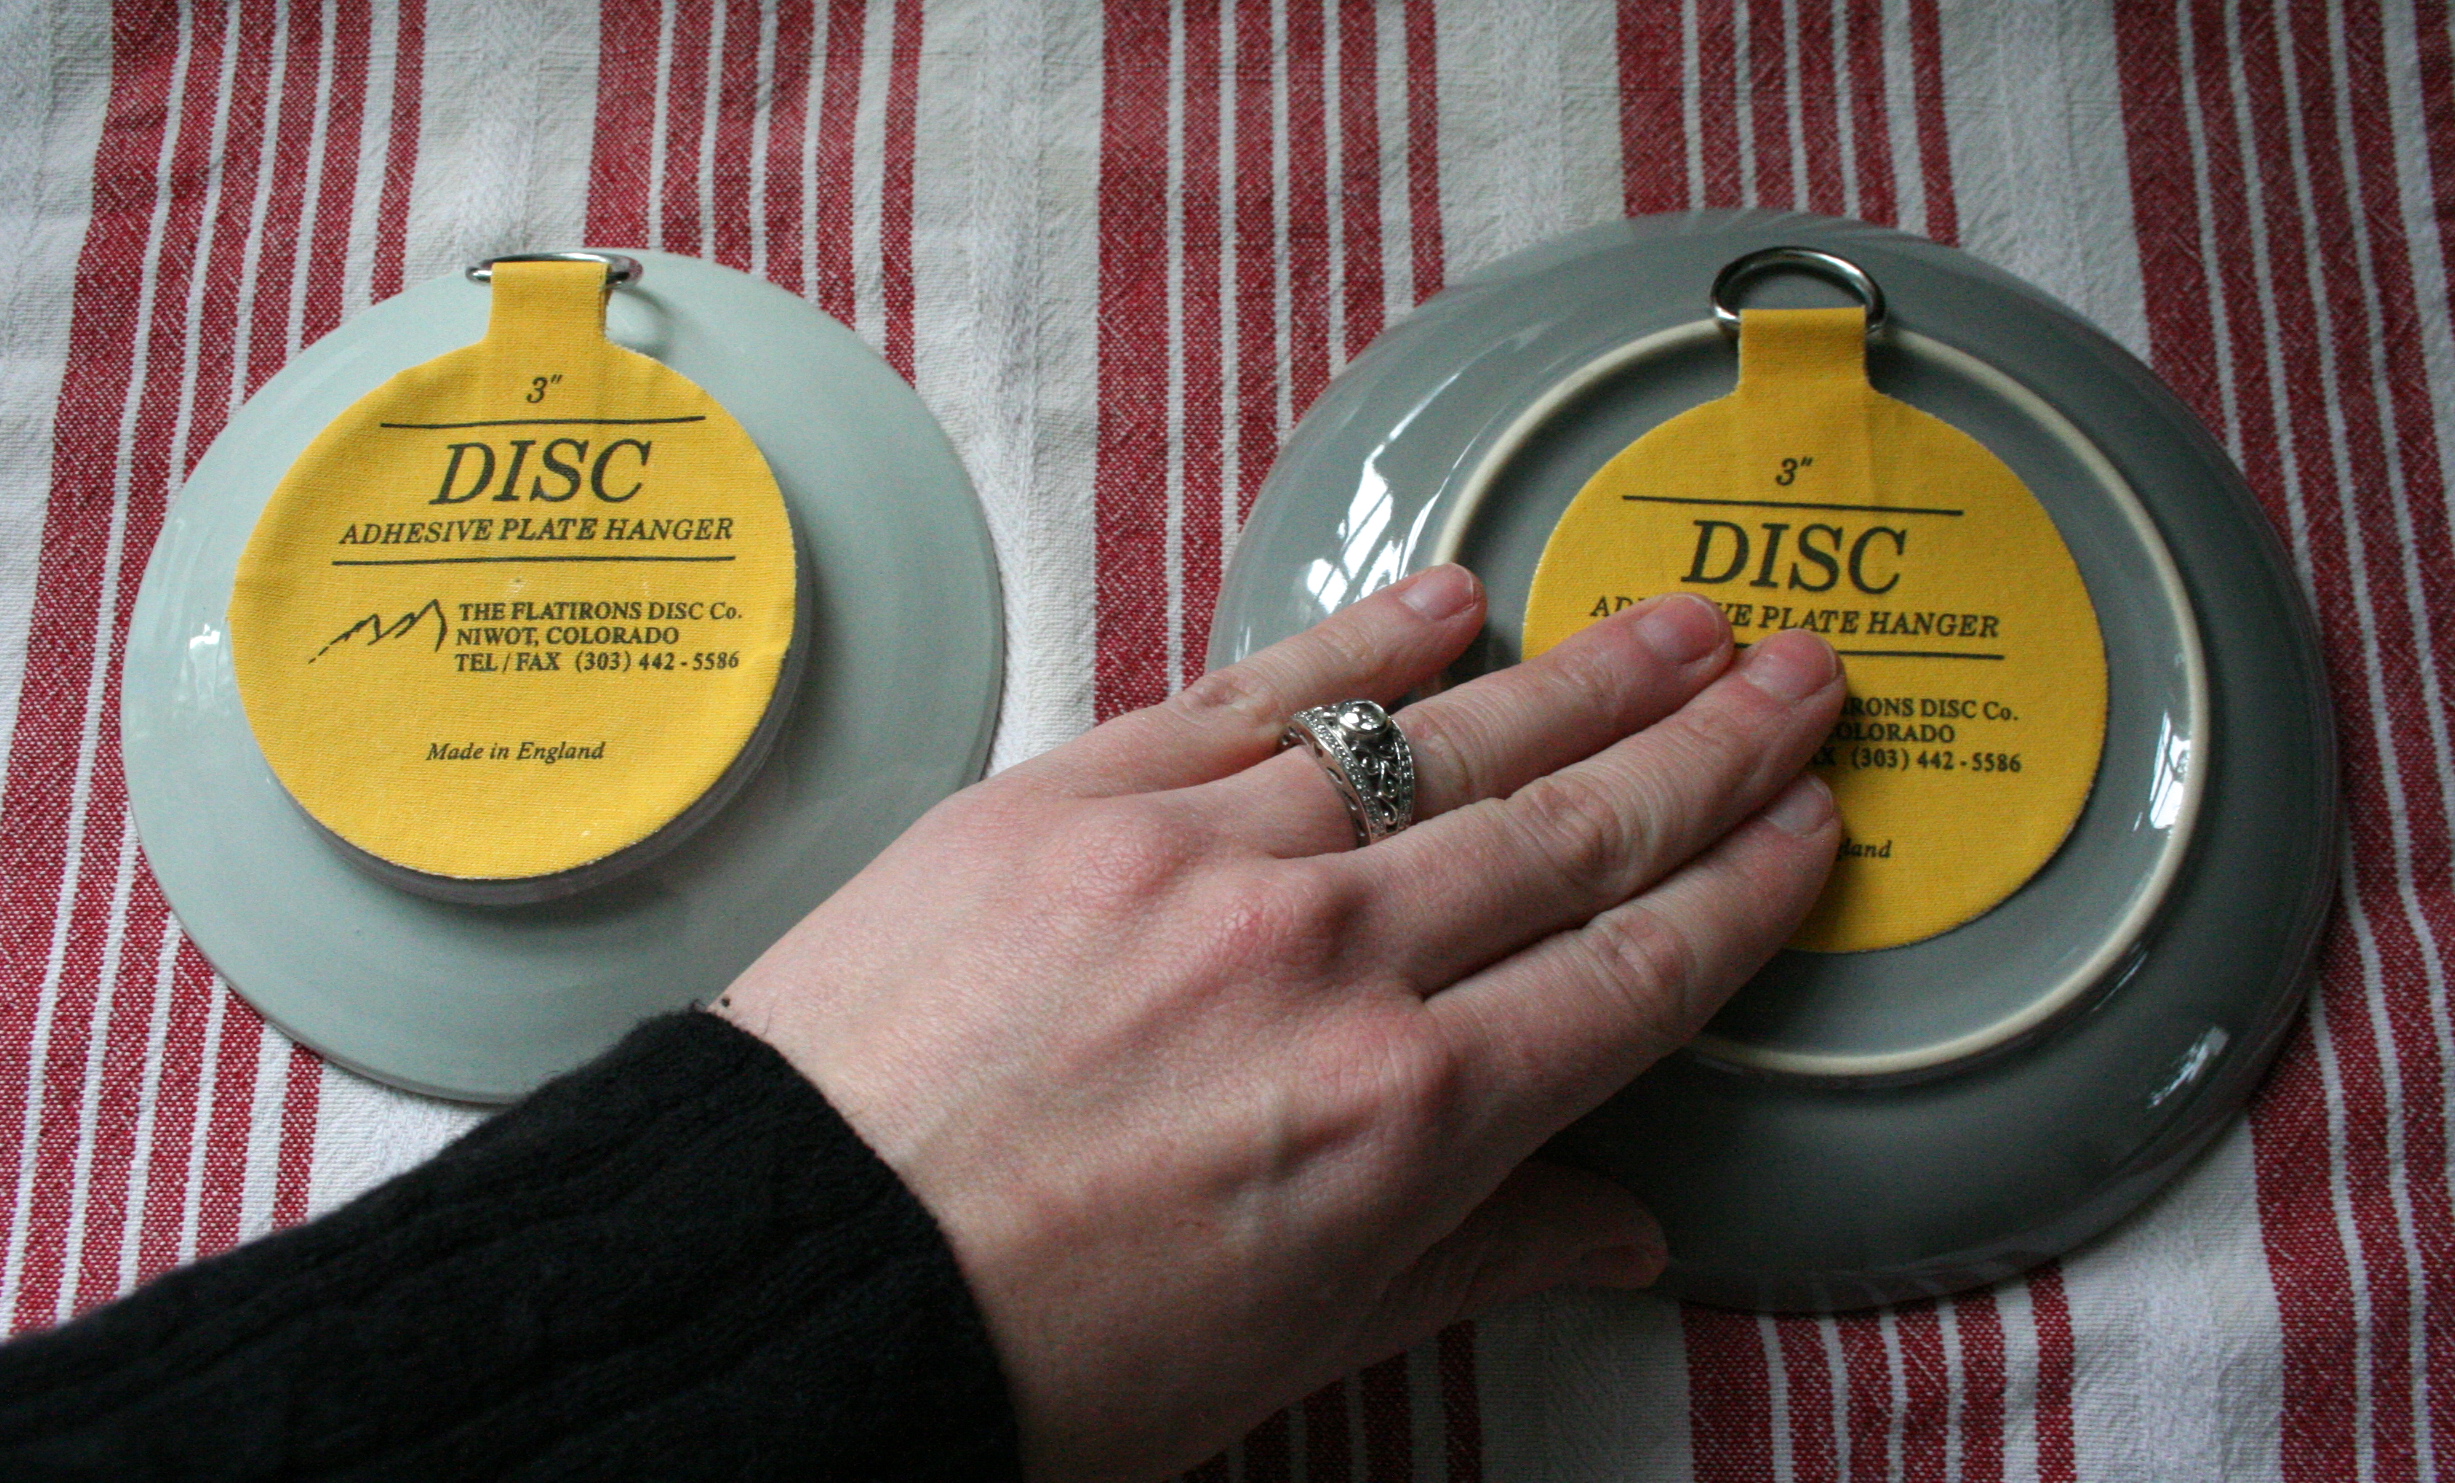
For plates that are larger than the disc, simply follow the instructions on the disc: Wet back of disc, let stand for 5-7 minutes, then press to adhere to back of plate. However, if the disc is slightly larger than the plate back, you may want to first give it a trim.
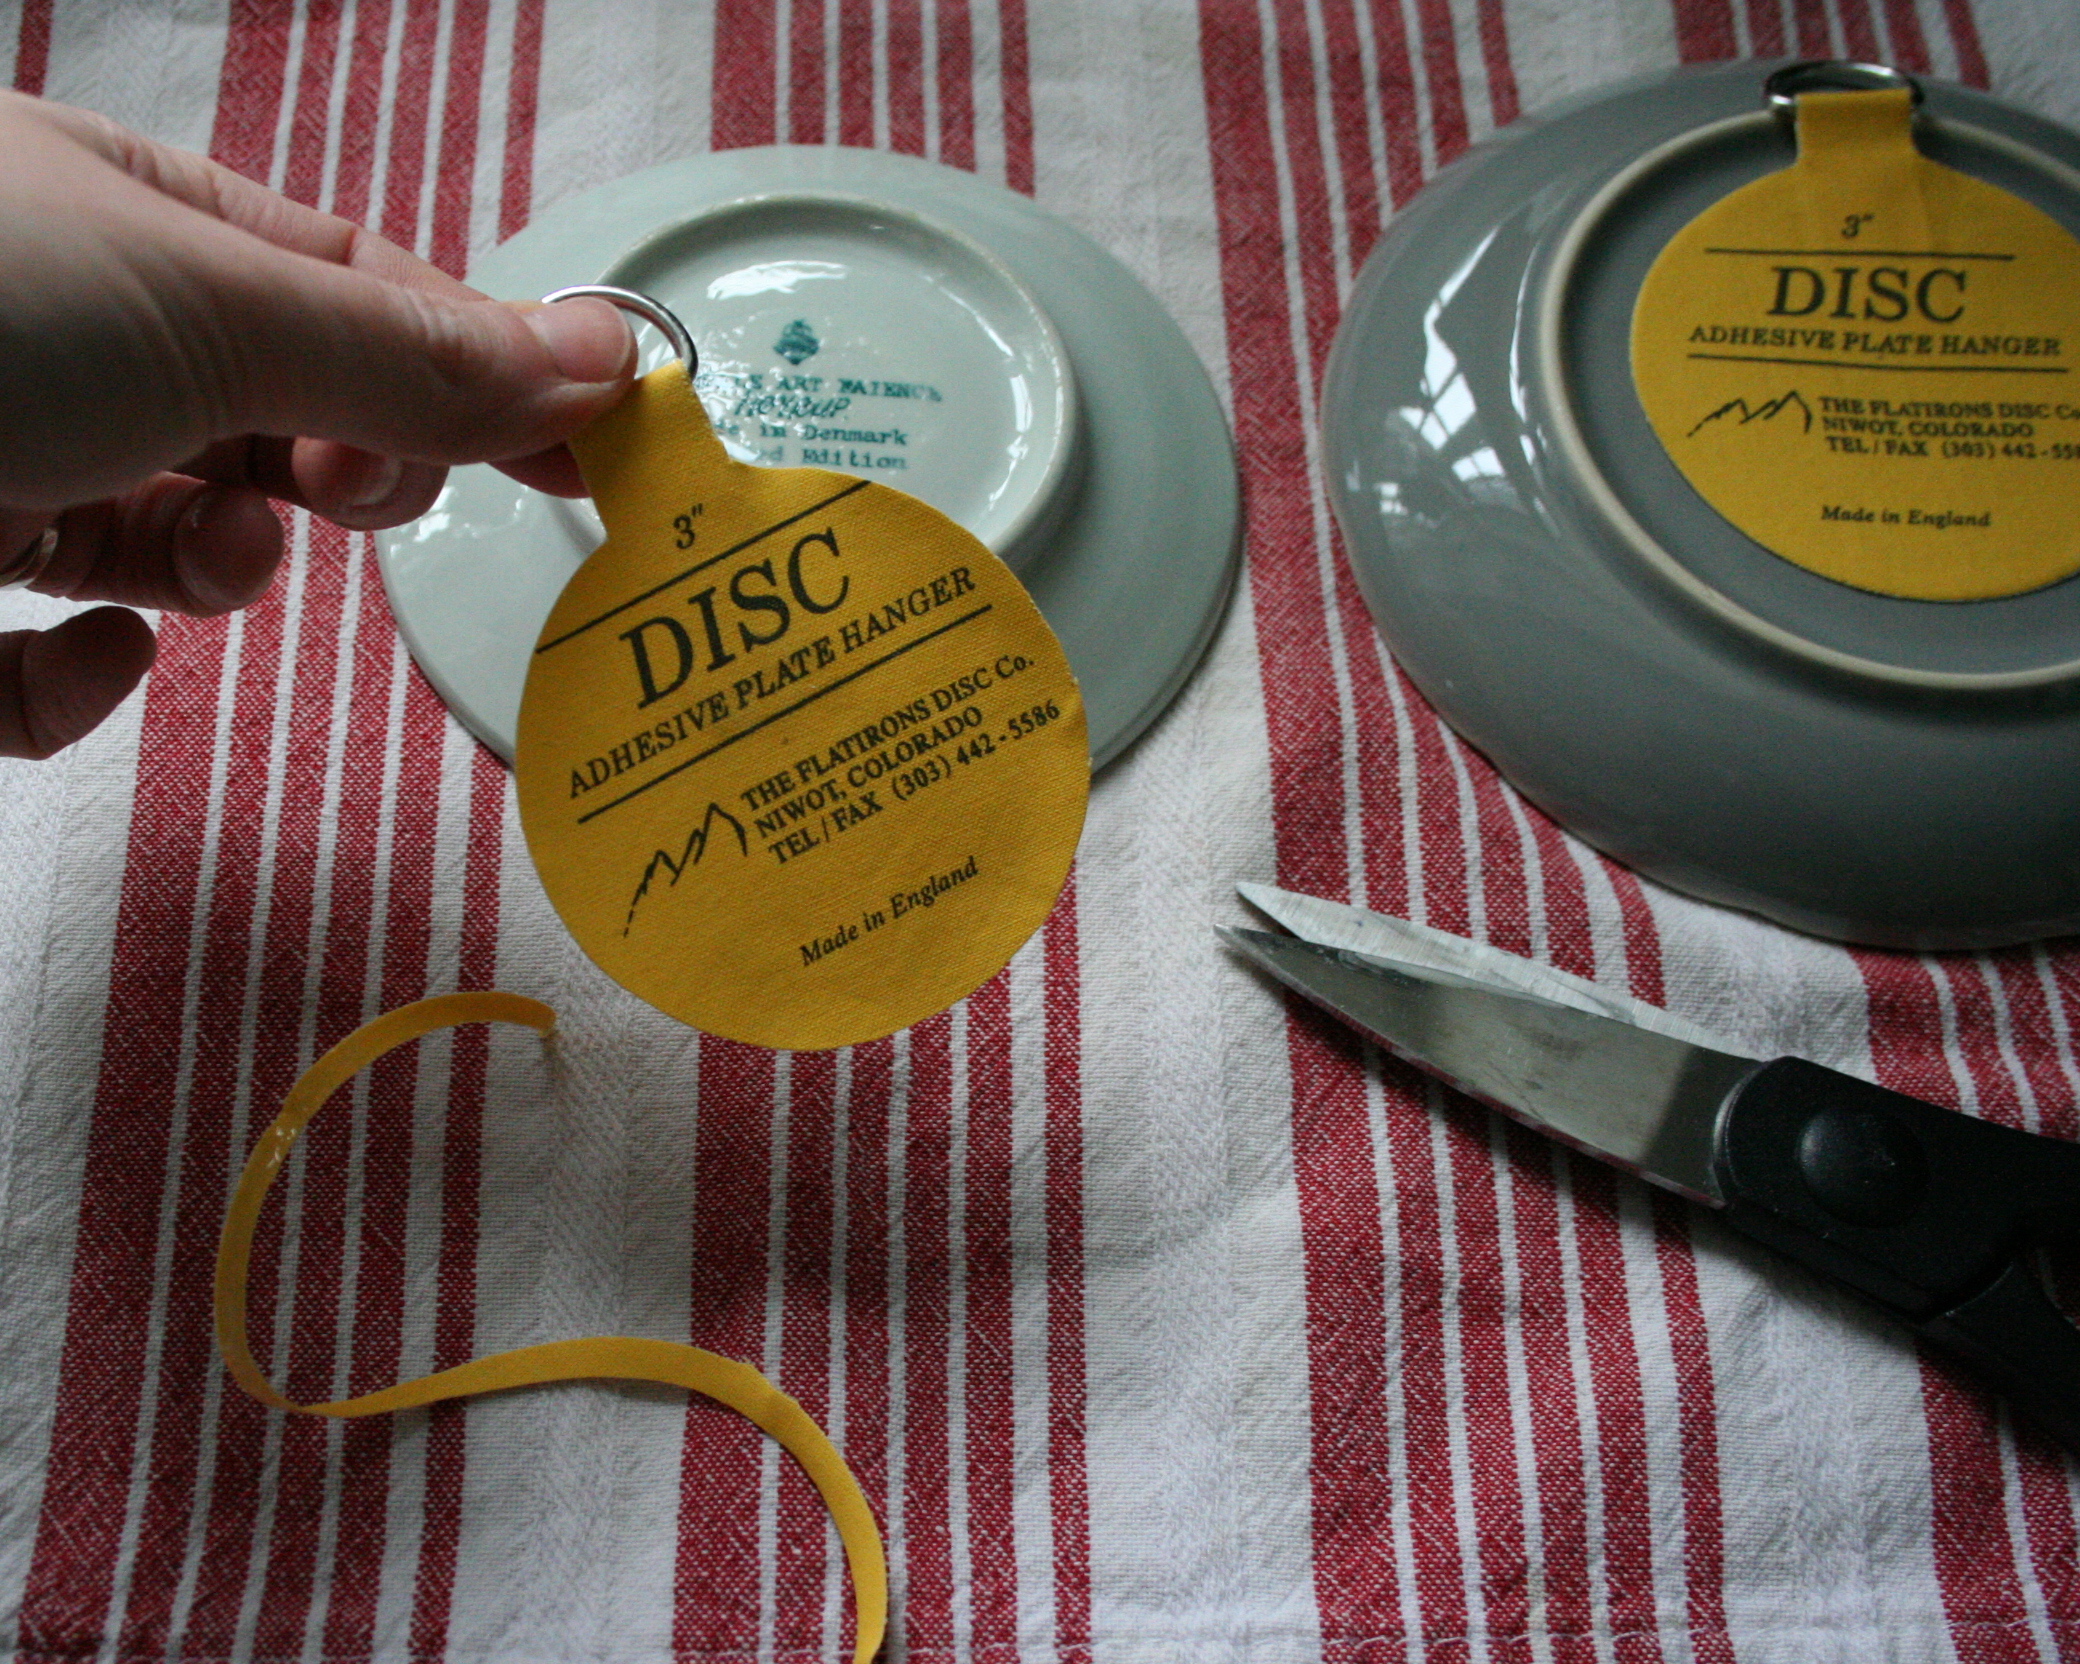
Once trimmed to fit your place, follow the instructions on the disc (described above) to securely attach the disc to the plate.
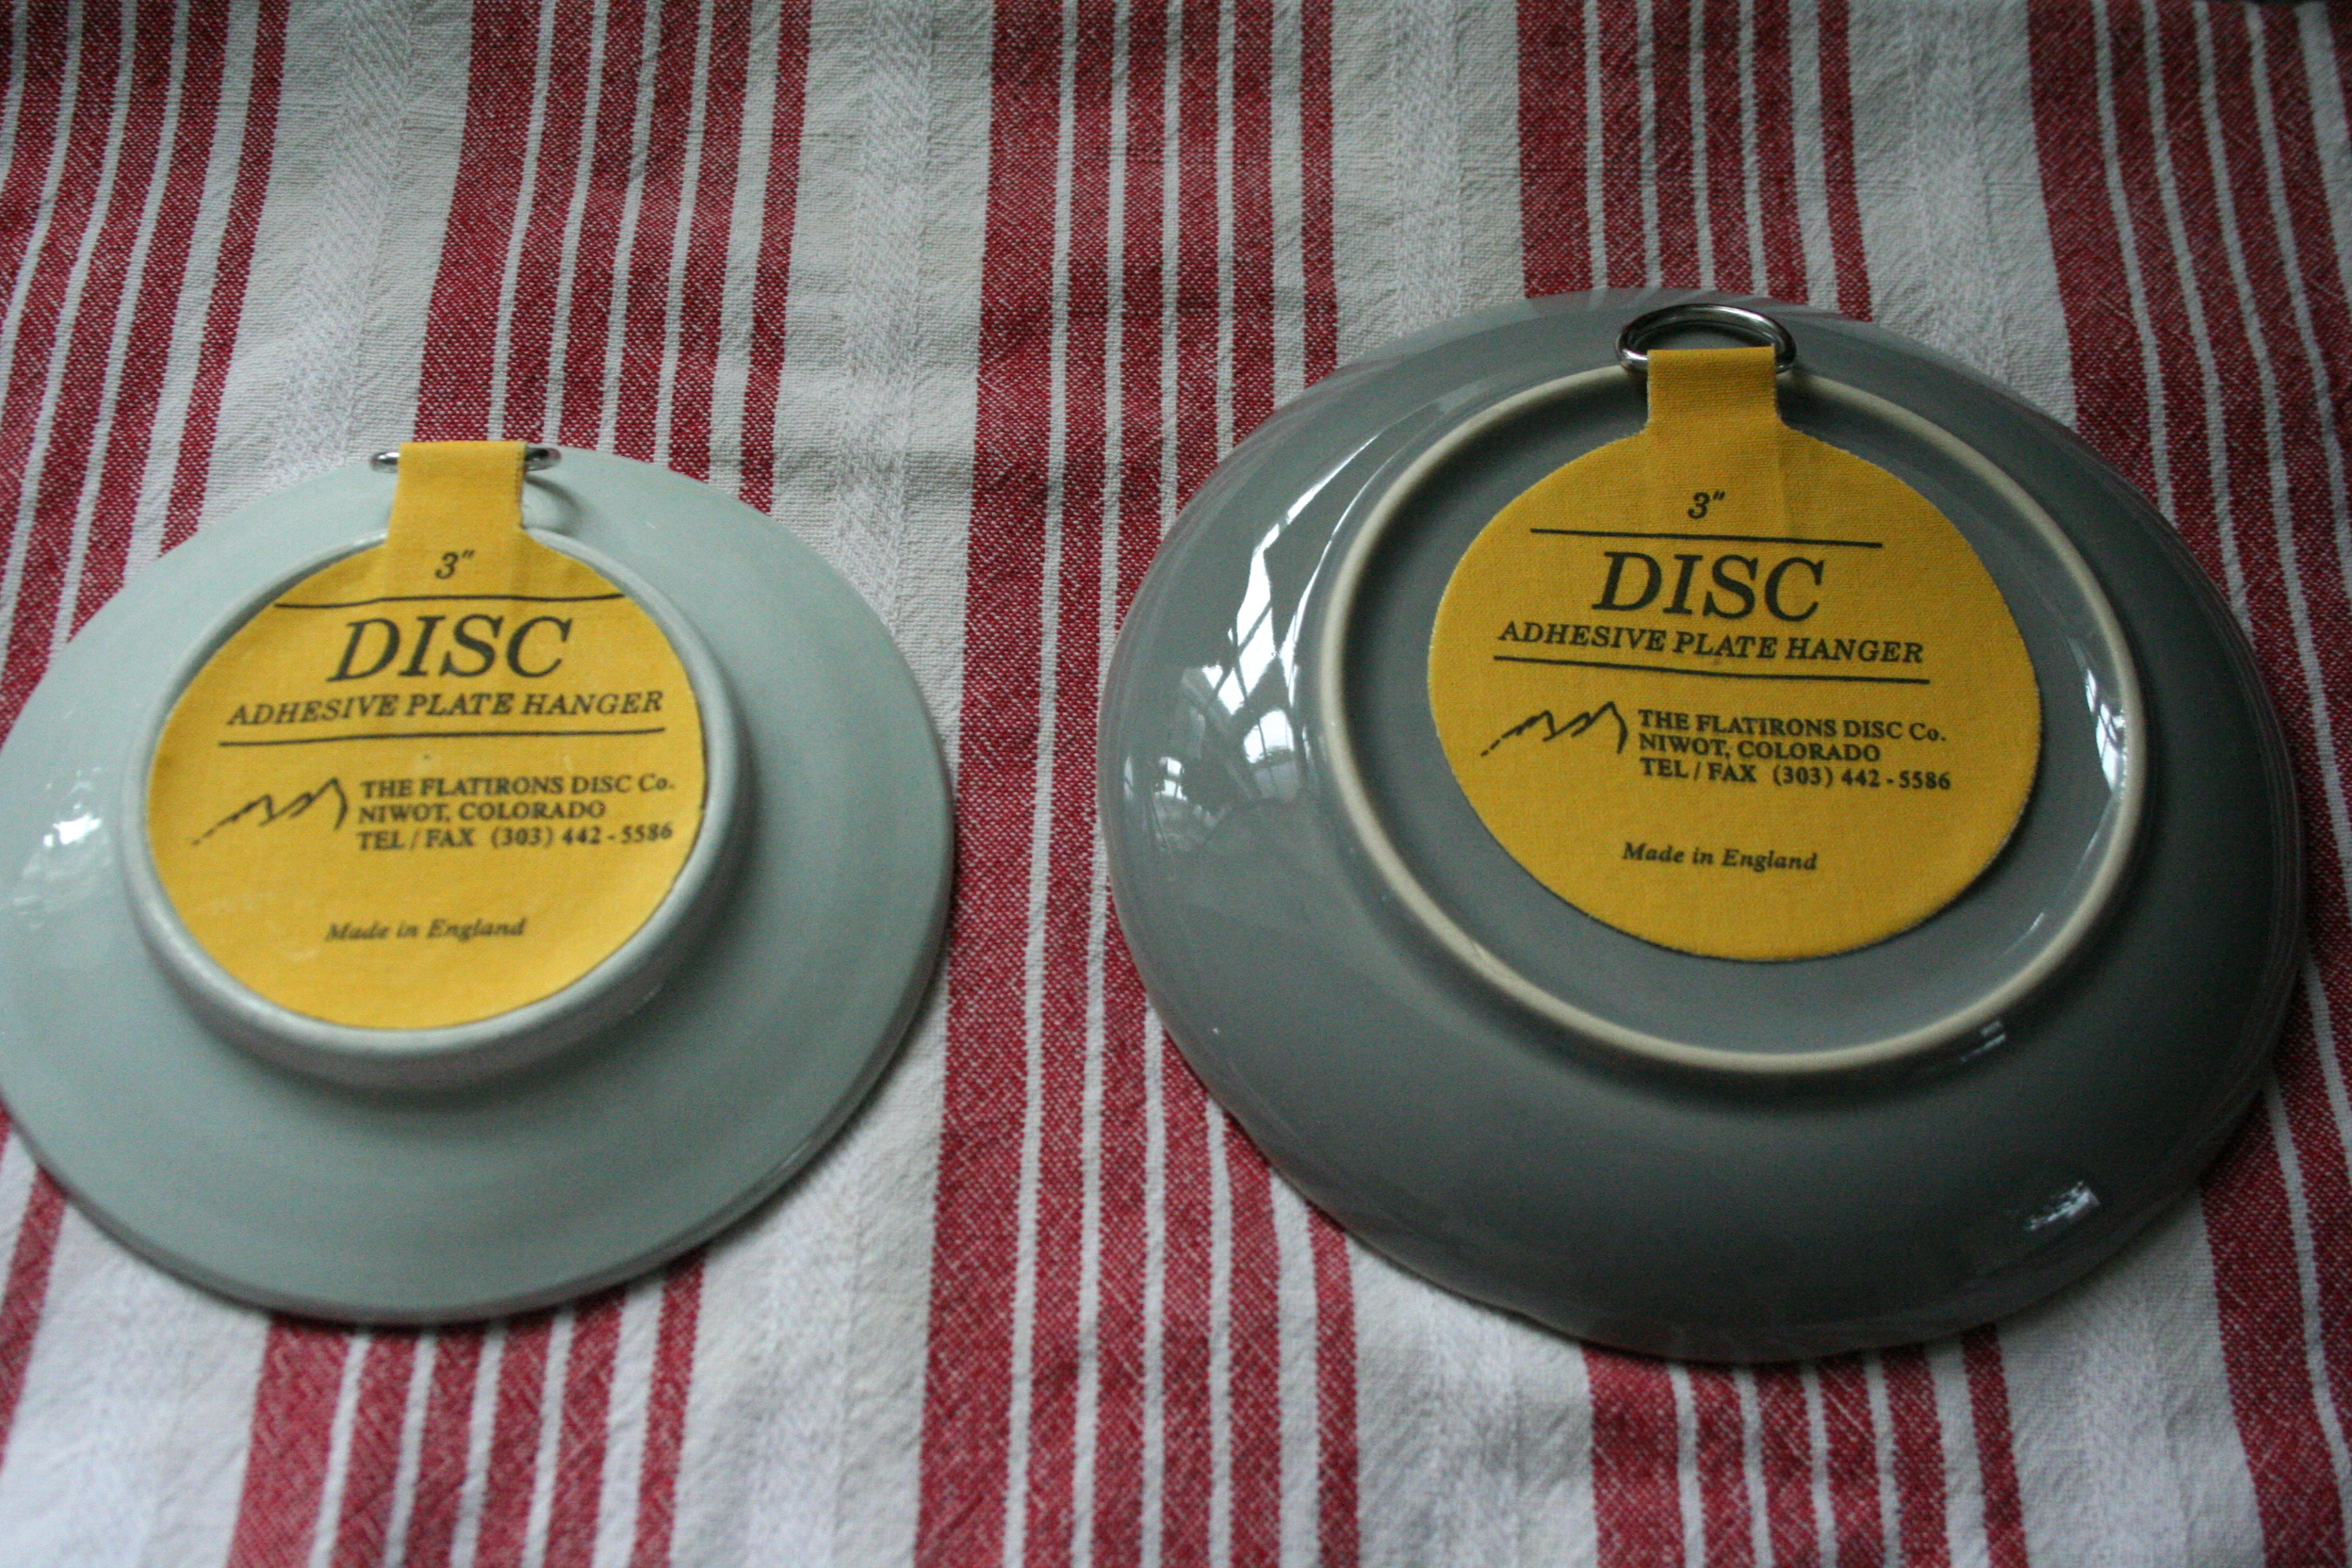
STEP SEVEN: WAIT FOR THE DISCS TO DRY OVERNIGHT
I know this is can be torture for some of us, but I promise you can do it! This will ensure that your plates don’t fall off the wall and break due to poor adhesion to the disc.
STEP EIGHT: HANG

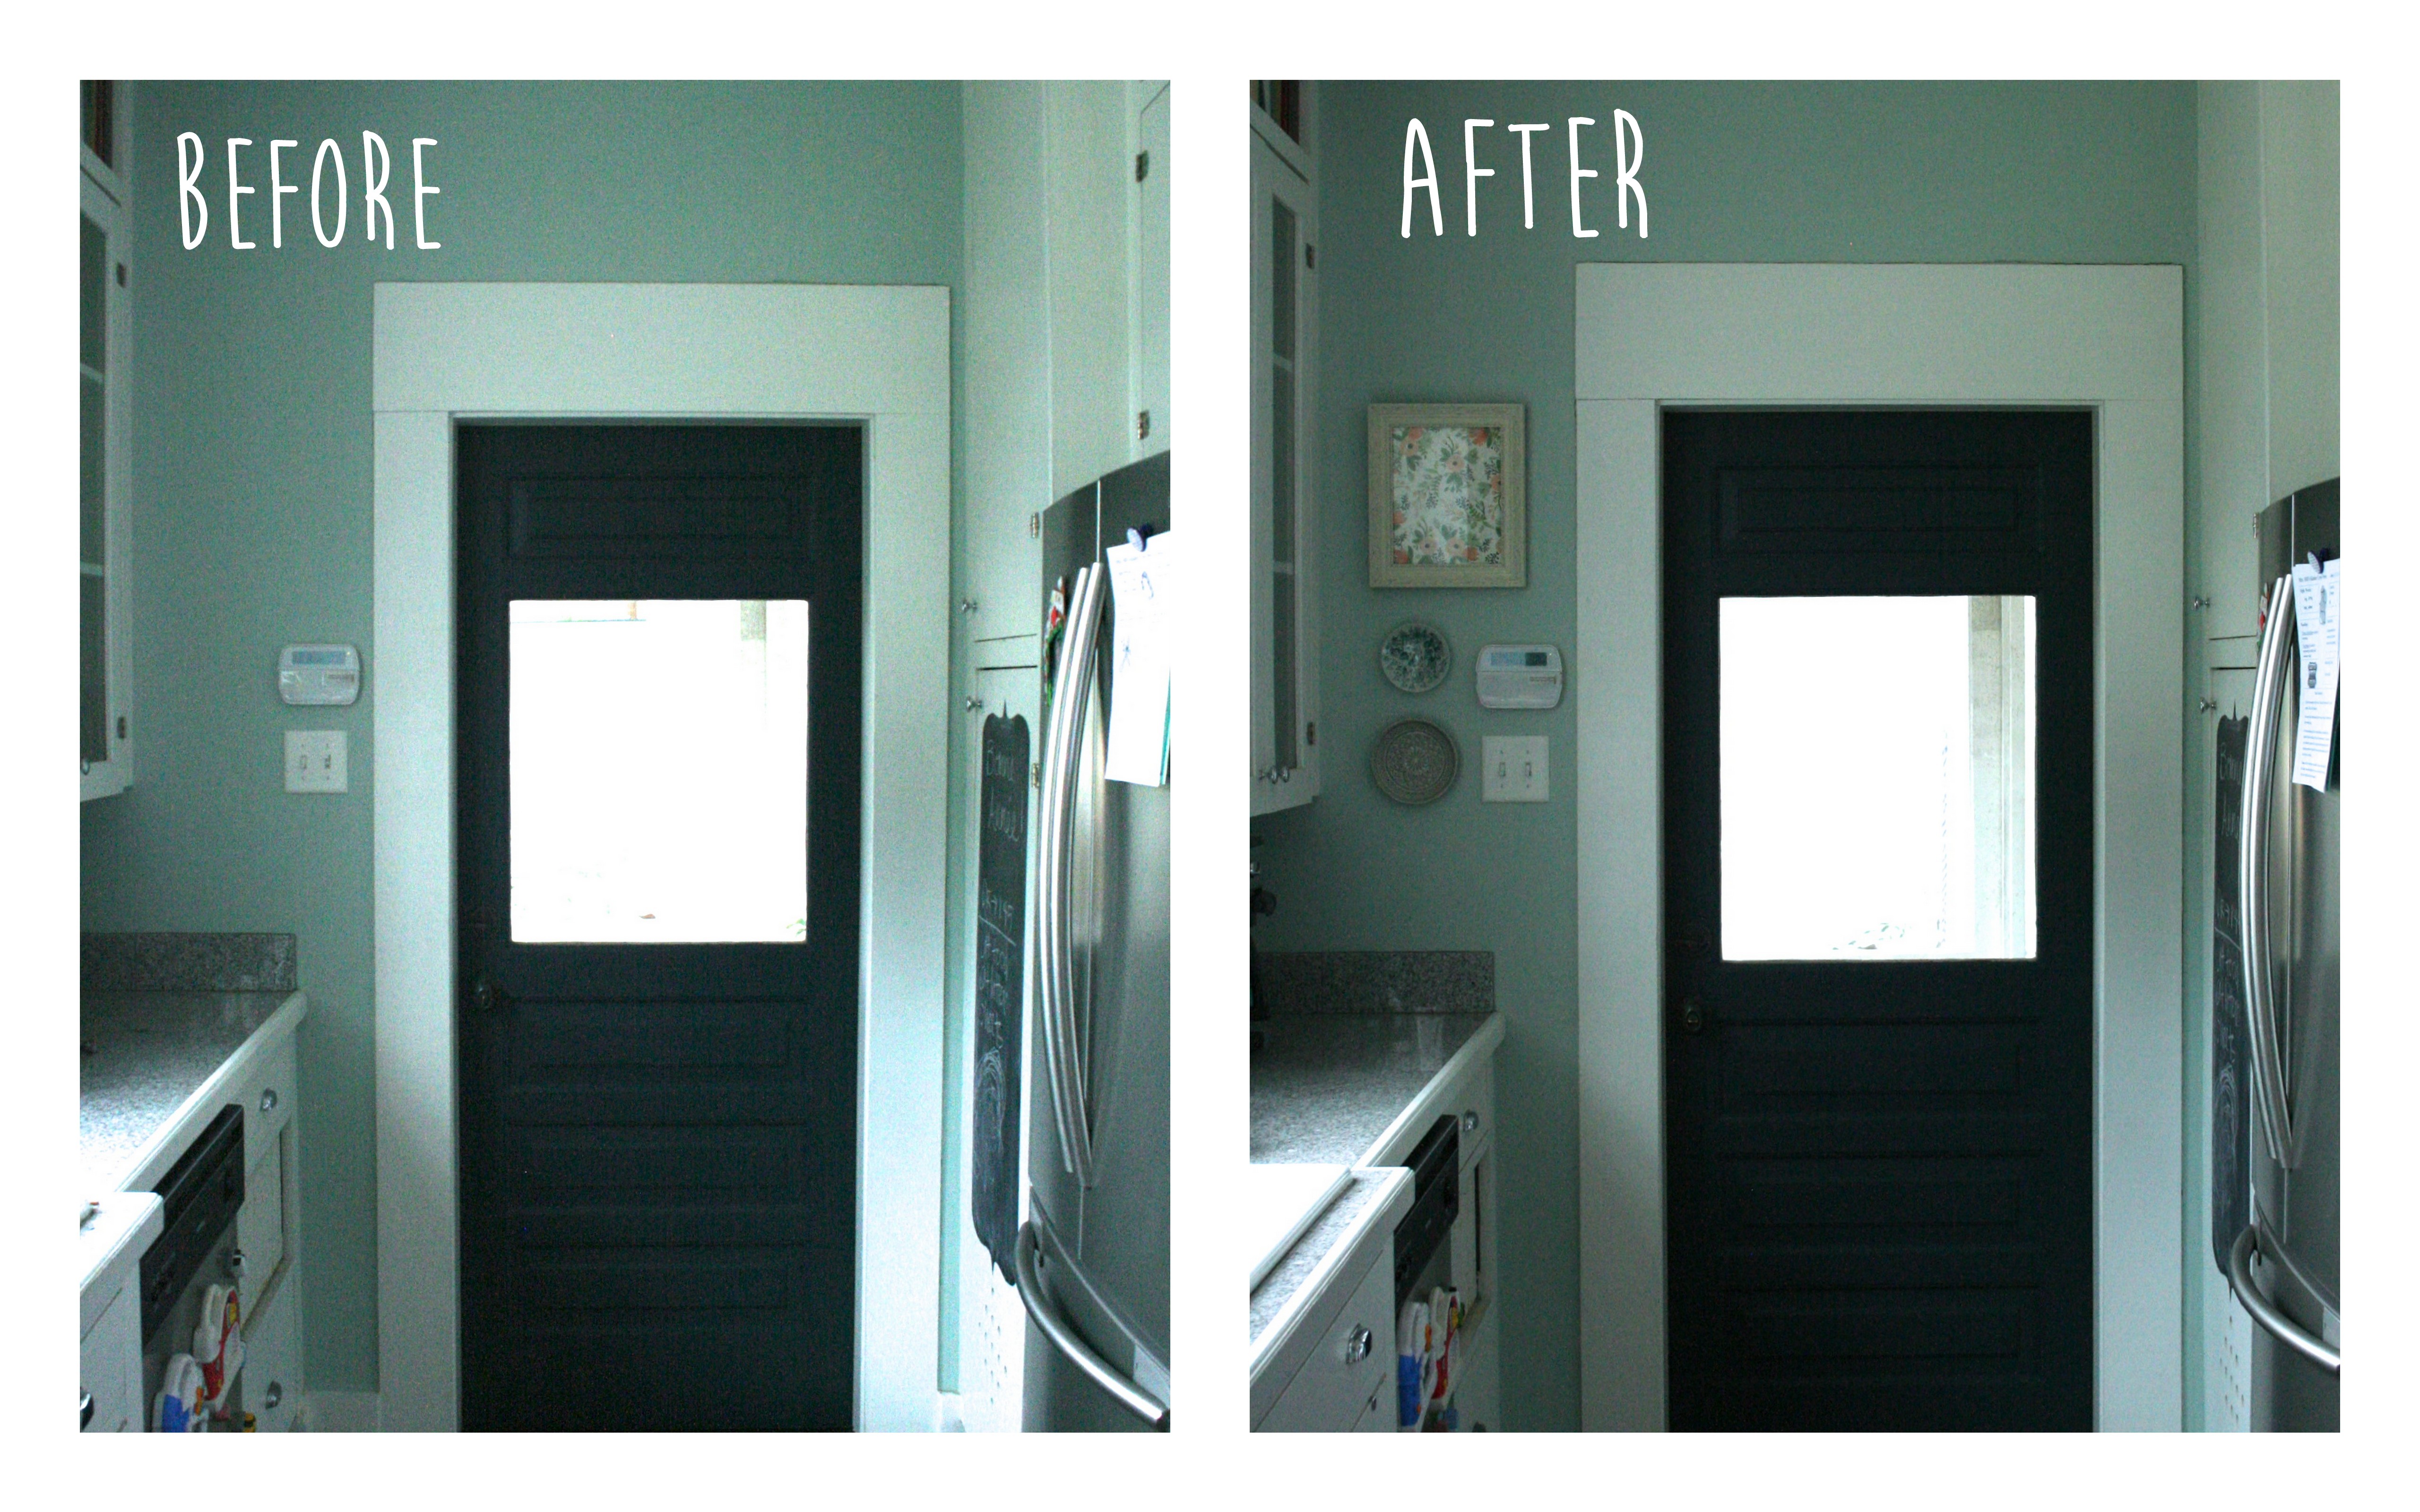
The most fun part! I chose to hang my framed paper and two plates next to my kitchen door. It brings a little personality to my everyday comings-and-goings and livens up this little space. What do you think? Do you have any favorite paper designs that are worth framing?
Up Next: Design Crush DIY: Cards as Artwork
